Transitions taking twice as long as you planned. You find yourself repeating things like, “clean up before you rotate” and “don’t forget to push in your chairs”. You’re also answering “what do we do next?” for what feels like the fifth time in a row.
If this sounds like I’ve been a fly on the wall in your classroom, you’re not alone. This is exactly what my classroom sounded like until I realized the problem. I wasn’t providing my students with a visual of clear expectations during transitions.
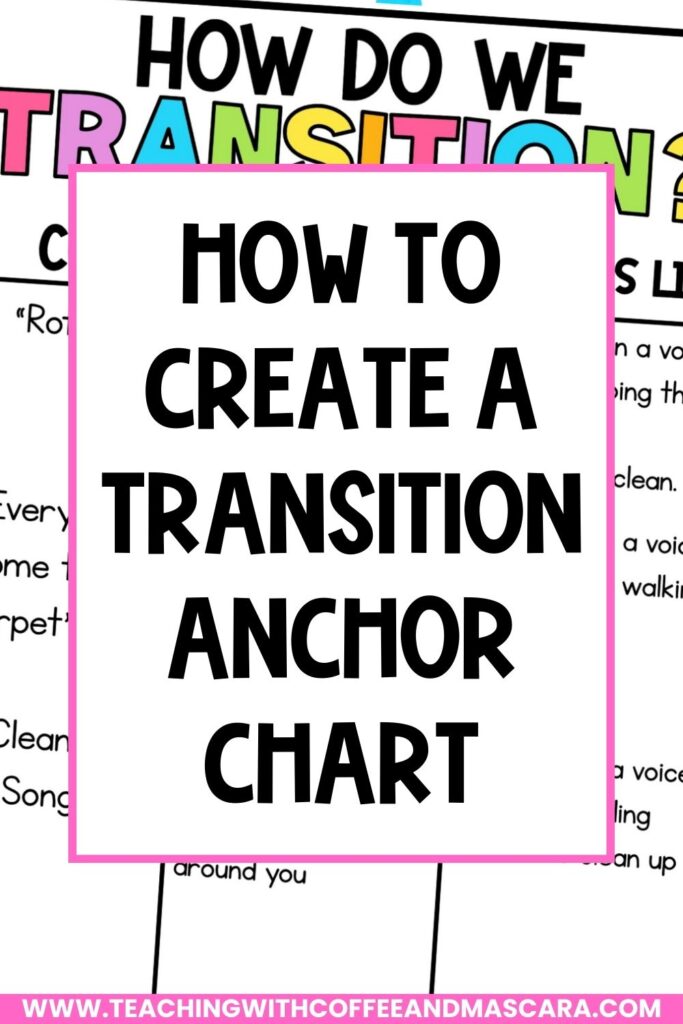
Once I figured that out, the solution was simple. I needed a way to show students exactly what I expected of them so they could reference it and know what to do without relying on me. Today, I’m sharing how to turn an anchor chart into an effective transitions anchor chart that helps you spend less time repeating yourself and more time teaching.
Prefer to watch instead of read? You can watch the full video here.
Table of Contents
Why Are My Students Having Trouble Transitioning?
If you students are having trouble transitioning, the issue usually isn’t behavior. It’s clarity. When students don’t know what’s expected during a transition, things fall apart quickly. Without a visual to support them, they’re left guessing, forgetting, or waiting for you to tell them what comes next.
What Makes a Transitions Anchor Chart Actually Work?
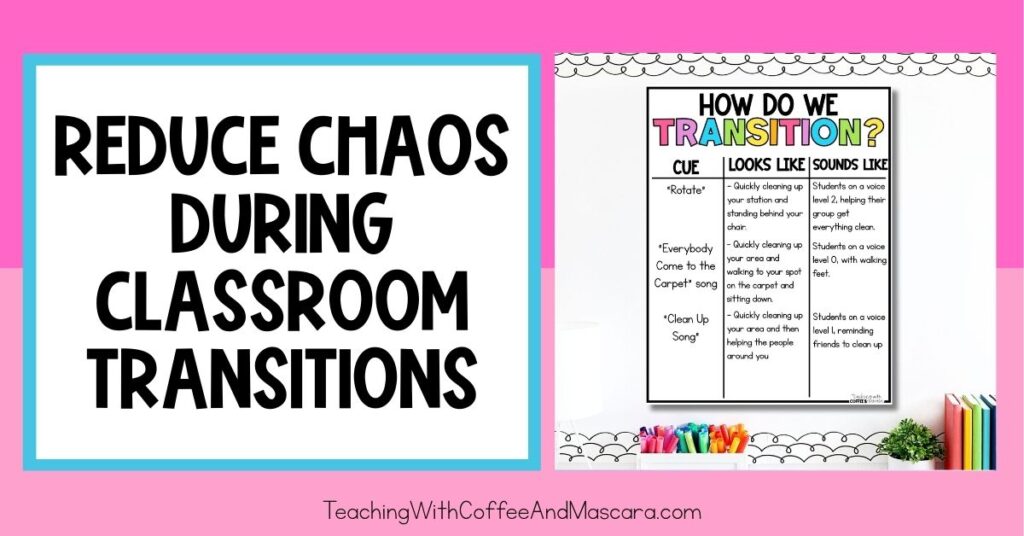
An effective transitions anchor chart gives students a clear visual of expectations they can reference independently. It shows them exactly what to do, in what order, and what the transition should look and sound like.
How Do You Make a Transition Anchor Chart?
Step 1: Print/Create Your Anchor Chart
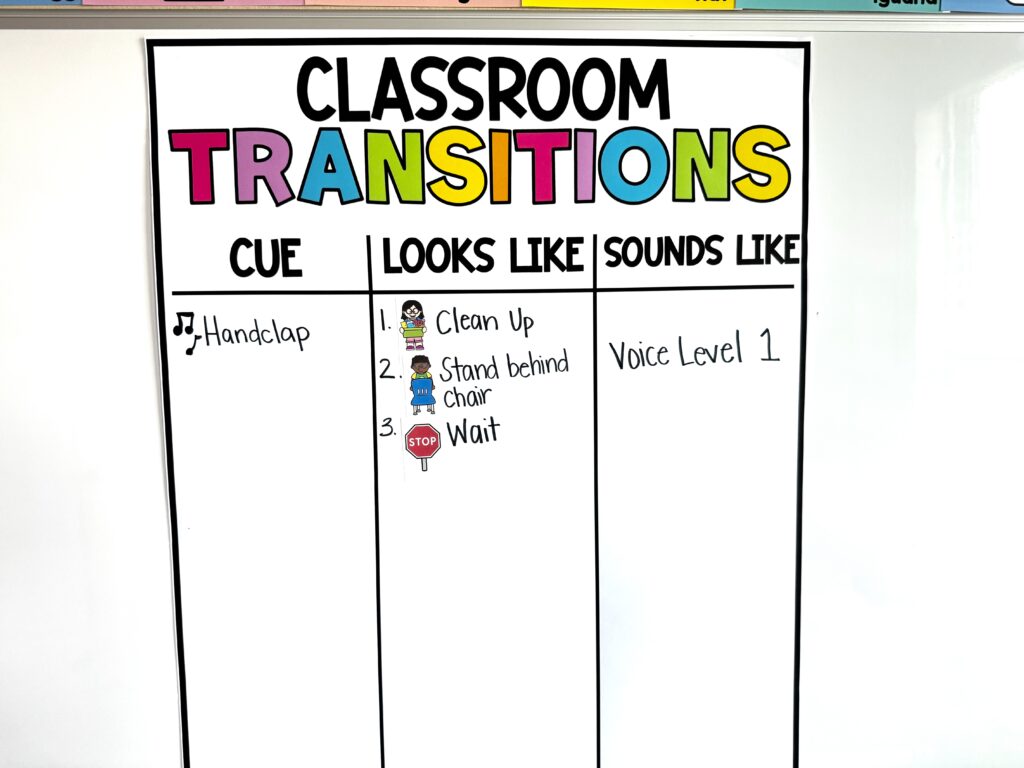
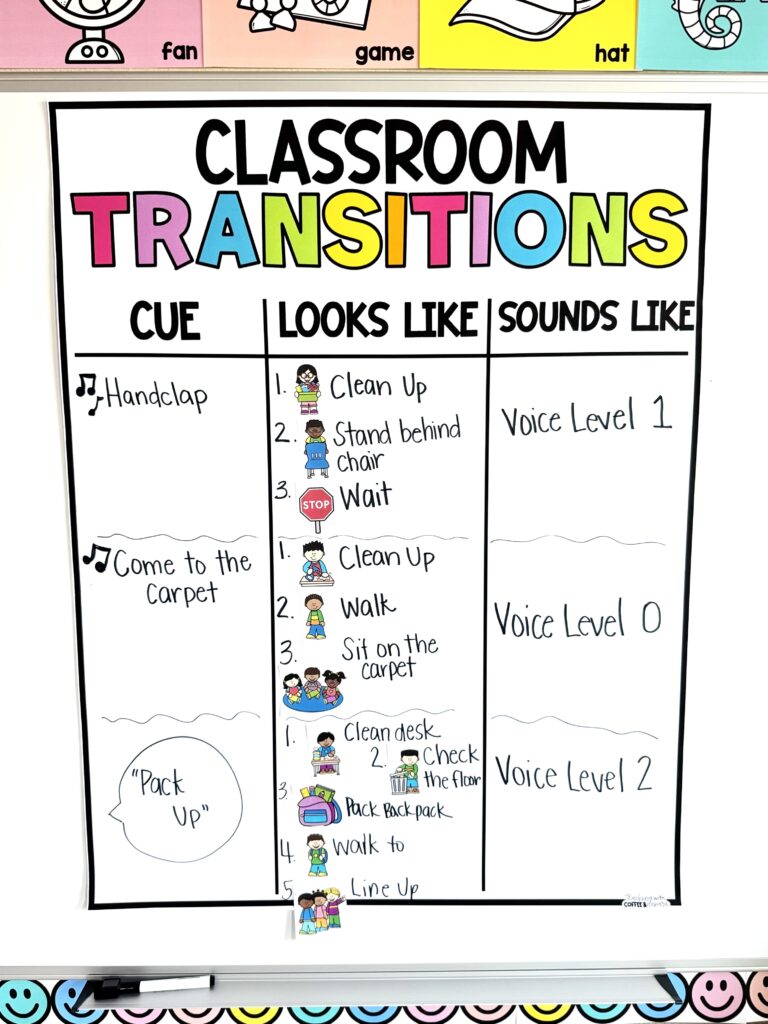
I love to use my free anchor chart for this, but you can also create one that doesn’t use any ink on your own piece of butcher paper. You want the headings: “cue”, “transition”, “looks like”, “sounds like”.
Step 2: Choose the Right Transition
Start by picking one transition to focus on. Choose something your class can already do fairly well but could improve with practice. The goal is to start small, build confidence, and set students up for success before tackling the most challenging transitions.
Step 3: Build the Anchor Chart With Your Students
Don’t Fill It In Ahead of Time
The anchor chart should not be completed before the lesson (other than the headings). Bring in a chart with headings already in place, but leave it blank so you can create it together with your students.
Walk Through the Steps Together
Tell students what the cue will be, such as a song. Ask them what that cue means and guide them through each step of the transition. Fill in the chart together by asking what comes first, what comes next, and what the classroom should sound like during the transition.
Keep It Simple
Use simple words and pair steps with visuals when helpful. Aim for three to five steps so it’s clear without being overwhelming. Visuals are especially helpful for younger students and English language learners.
Step 4: Practice the Transition
Model First
Before students try it, model the transition yourself. Point to each step on the anchor chart and show exactly what it should look like.
Practice With the Same Cue
Once students practice, make sure you use the same cue every time. Whether it’s a song, a chime, or a clap, consistency helps students associate the cue with the steps and expectations.
Step 5: Use Positive Reinforcement
Positive reinforcement is one of the most powerful tools you have. When students follow the anchor chart and meet expectations, acknowledge it. This can be a cheer, a clap, or a class compliment.
When students feel successful, they’re more motivated to repeat the behavior. Celebrating small wins keeps them on track and builds momentum.
Stack Transitions for Long-Term Success
Once students are confident with one transition, add another. Build routines one at a time so students don’t feel overwhelmed.
A little secret: save your most challenging transition for later. By the time you get there, students already understand how the anchor chart works and what’s expected of them.
What Smooth Transitions Can Look Like
Imagine giving the cue. Students glance at the anchor chart, clean up their stations, stand behind their chairs, and wait for the music to stop before rotating. No chaos. No confusion. Just smooth, quiet transitions.
That’s the power of clear expectations and consistency.
Final Thoughts on Transition Procedures
Using a visual like a transitions anchor chart can completely change how transitions feel in your classroom. If you’re ready to bring more calm and consistency into your day, try creating one and see the difference it makes.
For more classroom transition ideas, check out these posts:
- 3 Simple Ways to Get Transitions Running Smoothly
- How to Use Transition Songs
- The Secret to Smooth Classroom Transitions
Save These Classroom Transition Tips
Save this post so you can come back to these transition ideas whenever you need them! Just pin it to one of your favorite teaching boards on Pinterest. That way it’s right there when you’re looking for simple, engaging ways to make your transitions smoother.