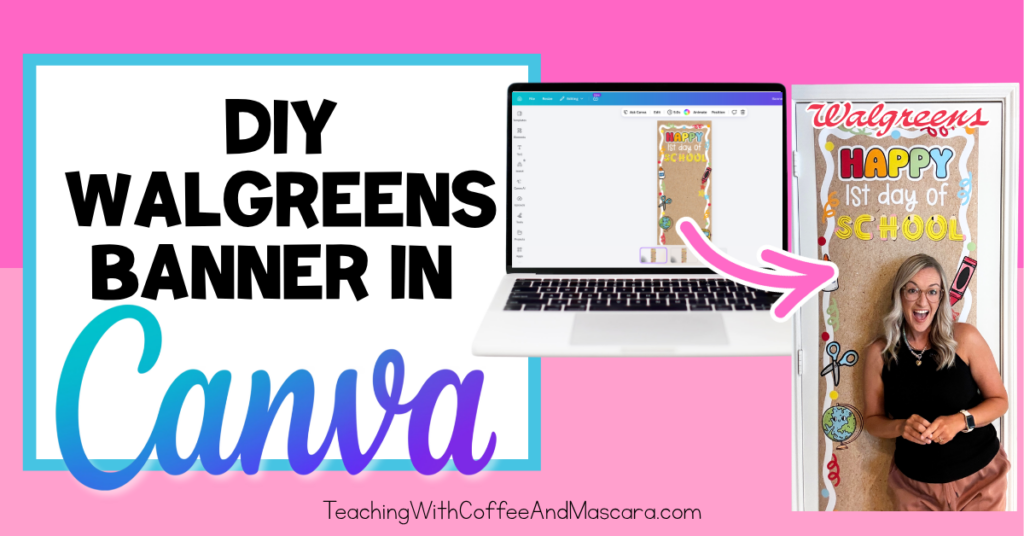
It’s the newest trend, the Walgreens banner, and I’m not mad about it.
No cutting out letters or pieces. We’re just printing the whole thing and hanging it up which makes classroom set up a breeze!
Today, I’m going to teach you how to make a banner in Canva and then how to order your Walgreens banner step by step.
I’ll walk you through everything from creating the banner in Canva to downloading it, uploading it to Walgreens, choosing your paper, and placing your order.
Prefer to watch instead of read? You can watch the full video here. 👇🏽
How to Make Your Banner in Canva
Choose Your Walgreens Banner Size
First up, you’re going to want to sign into Canva.
I like to make my banners in Canva, but you don’t have to. You could actually make yours in PowerPoint if you prefer.
This tutorial will show you how to make a banner in Canva. First, you’ll want to choose “custom size”.
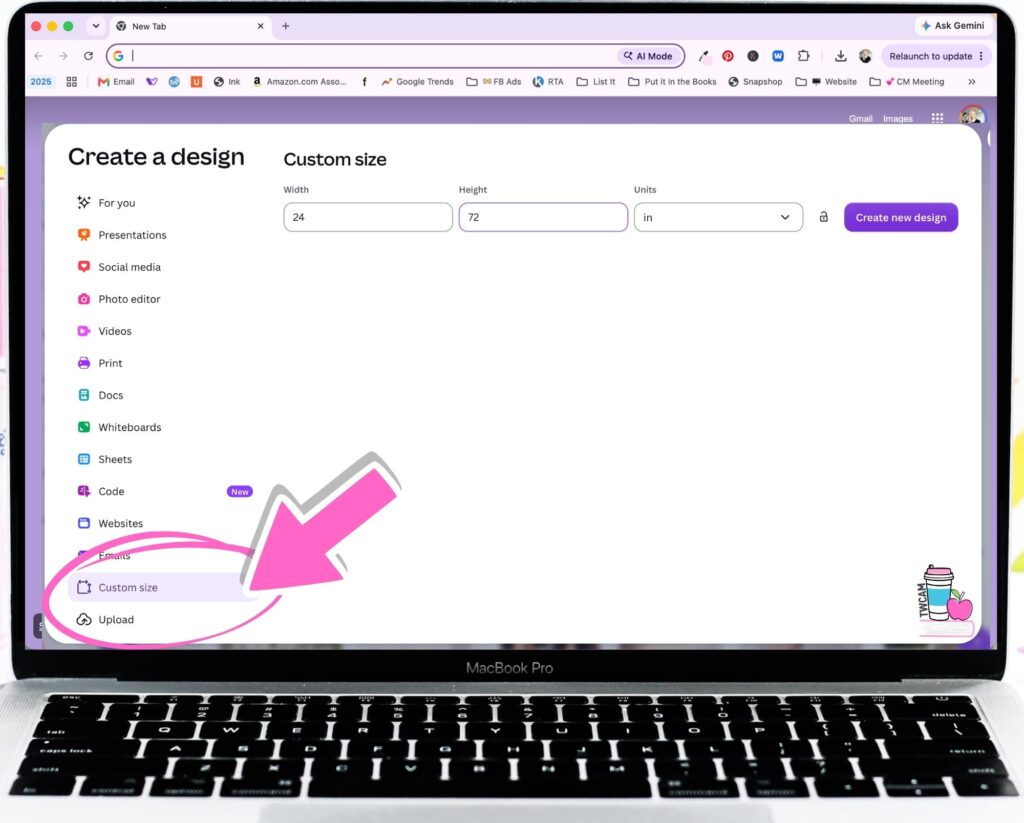
Then you’re going to want to change the measurement to inches or “in”.
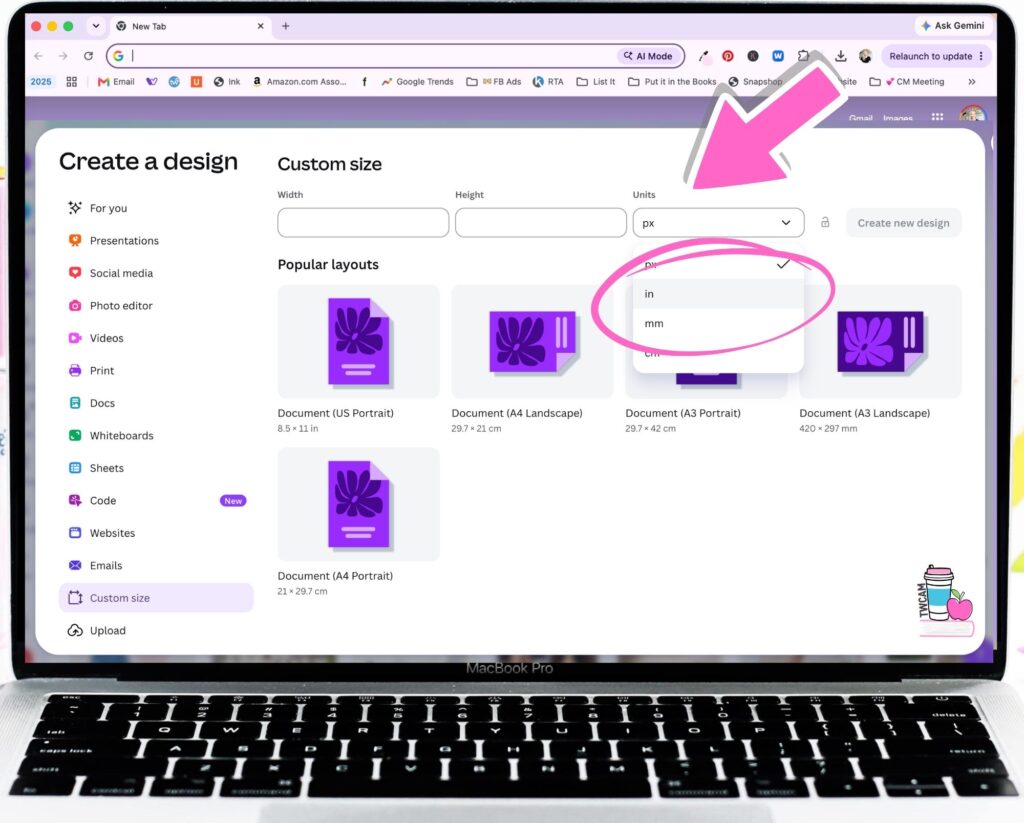
The Walgreens banner dimensions are 2 ft x 6 ft, so you’ll have to convert feet to inches when you’re creating your design in Canva.
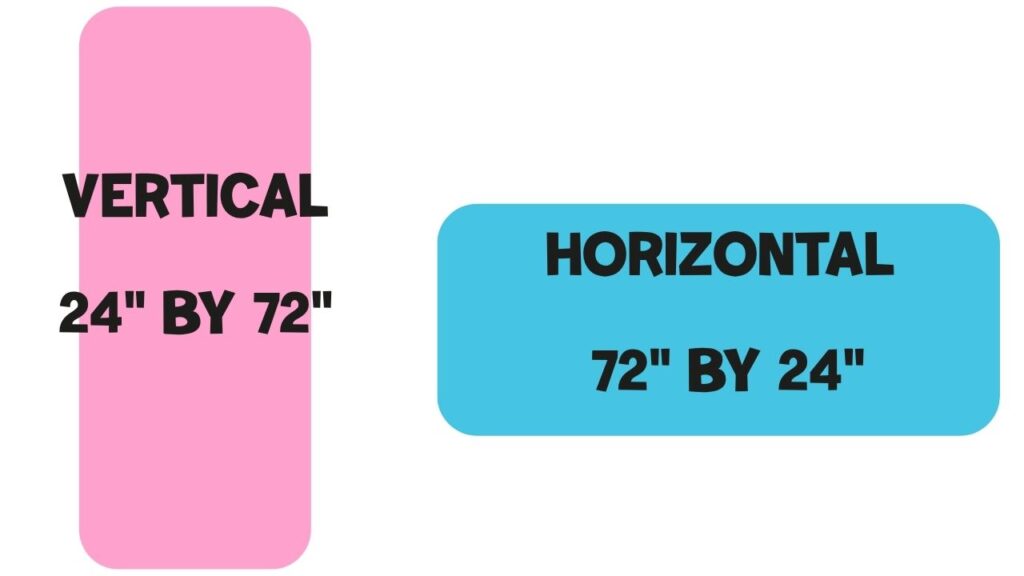
You also need to decide if you want your banner to be horizontal or vertical.
If you want a vertical banner, the 2×6 banner size in Canva is 24 x 72 inches.
If you want yours to be horizontal, you’ll want to make it 72 x 24 inches.
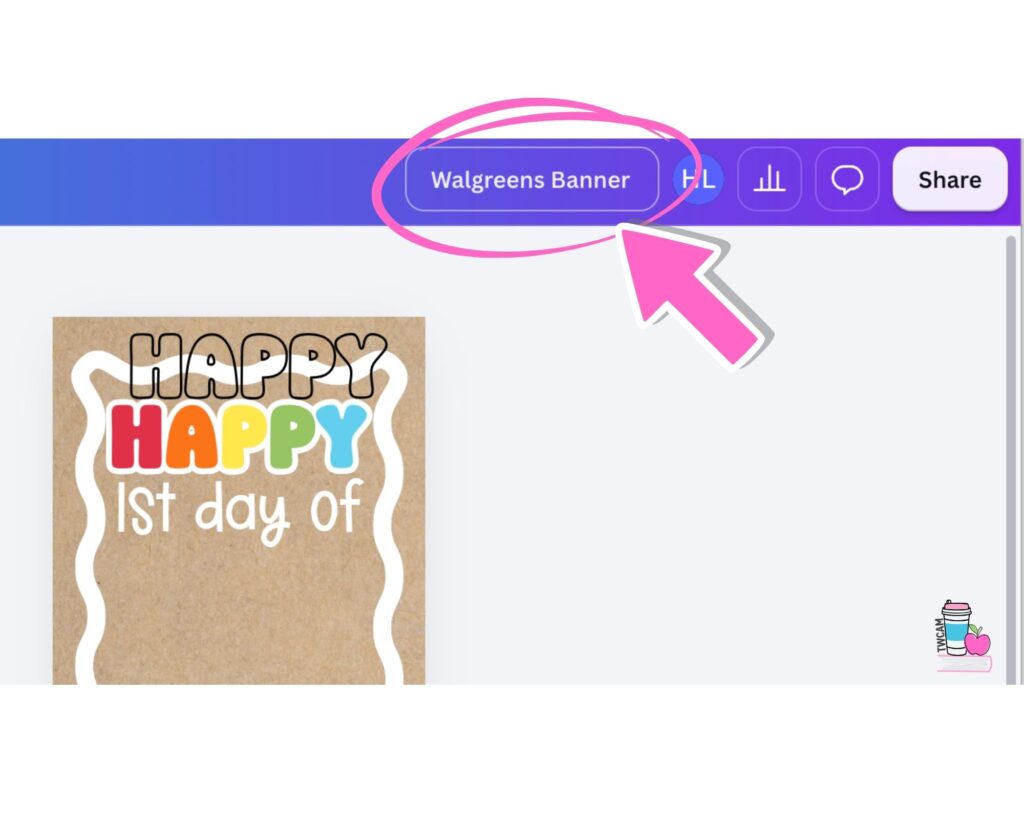
Once you have your size, go up to the top and change the title so that you can easily find your design later.
Add a Background and Border to your Banner
You can obviously use any background you want, but I’ve noticed that a lot of people have been doing those brown backgrounds, which I really like.
It basically looks like one of those posters that’s been painted, but you don’t have to go through the work of actually painting it.
To create that look, go to Elements in Canva and search for “brown paper.”
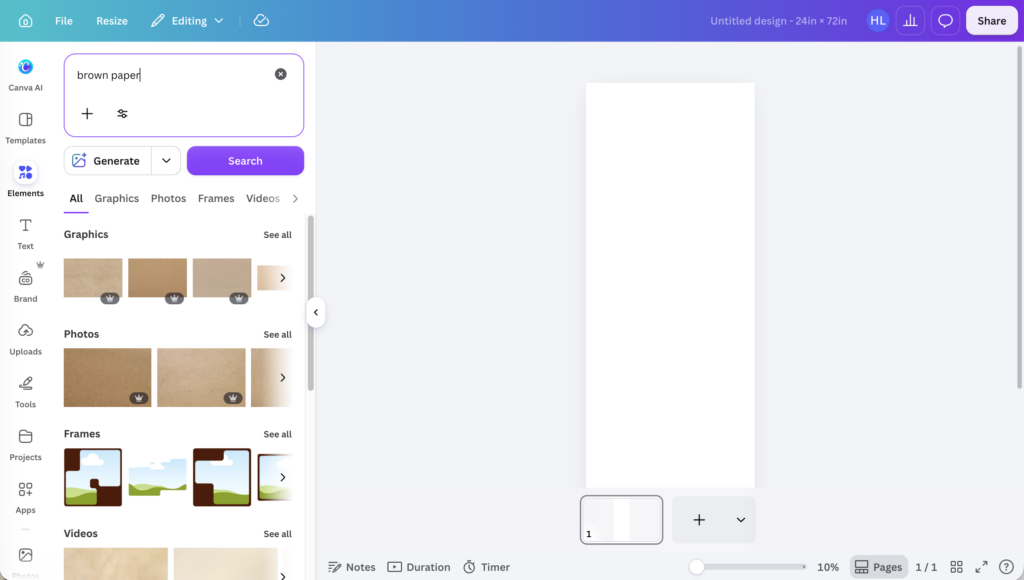
I just go through and find one that I like. The one I used gives the background a little bit of a paper texture, which is fun.
Next, you’ll probably want a border.
Of course, you don’t have to have a border, but I personally like to add one.
For this banner, we’re going to search for: “squiggle border.”
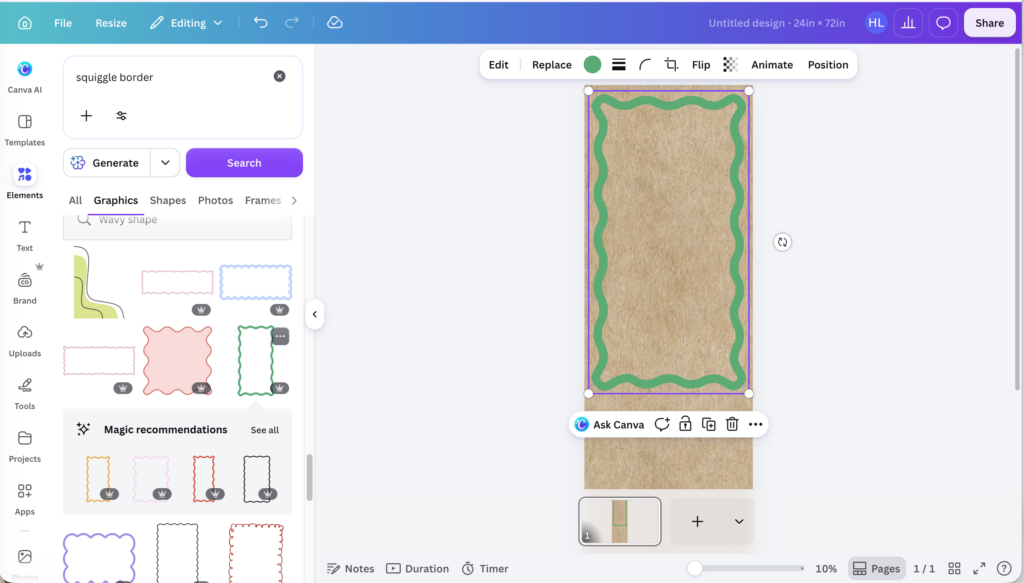
There are a lot of different widths or squiggle lines, so you can choose a border that’s thicker or thinner. I like the thickness of the green border I found. Then I changed the color to white.
You will probably run into the problem that most borders are not sized for this length of banner. You can see that the green border stops mid-banner.
To make this border work, we are going to duplicate it.
I just copied and pasted it on my computer. Then we’re going to use the crop tool to crop off the bottom of the top border and the top of the bottom border.
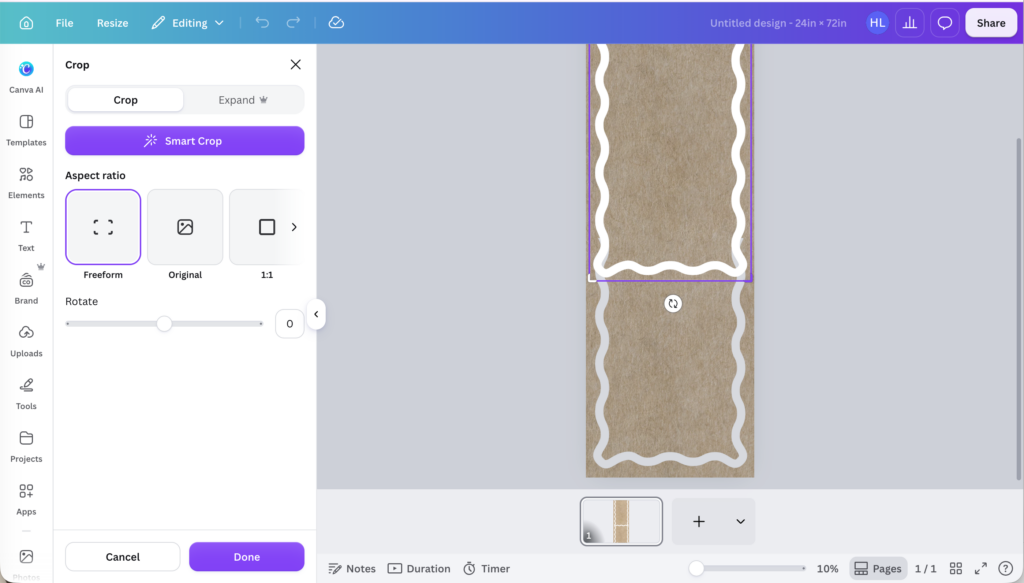
Now we can make the two pieces fit together to make one long border.
Once everything is lined up, I like to group it and align it. Those little purple lines in Canva help show you when everything is aligned. (these elusive purple lines refused to be in a screen shot so if you need to see what I’m talking about you will have to watch the video).
Add Text to your Banner
Next, we’re going to add text to the banner.
Go ahead and add a text box. For this banner, I made the main word about 400 in size and then chose a font.
I’m using a font that I’ve uploaded, but you can use the fonts that Canva has available, too. You can also upload your own fonts, although I believe you need Canva Premium to do that.
For my banner, I used KA Rose Skies and typed in the word, “happy.”
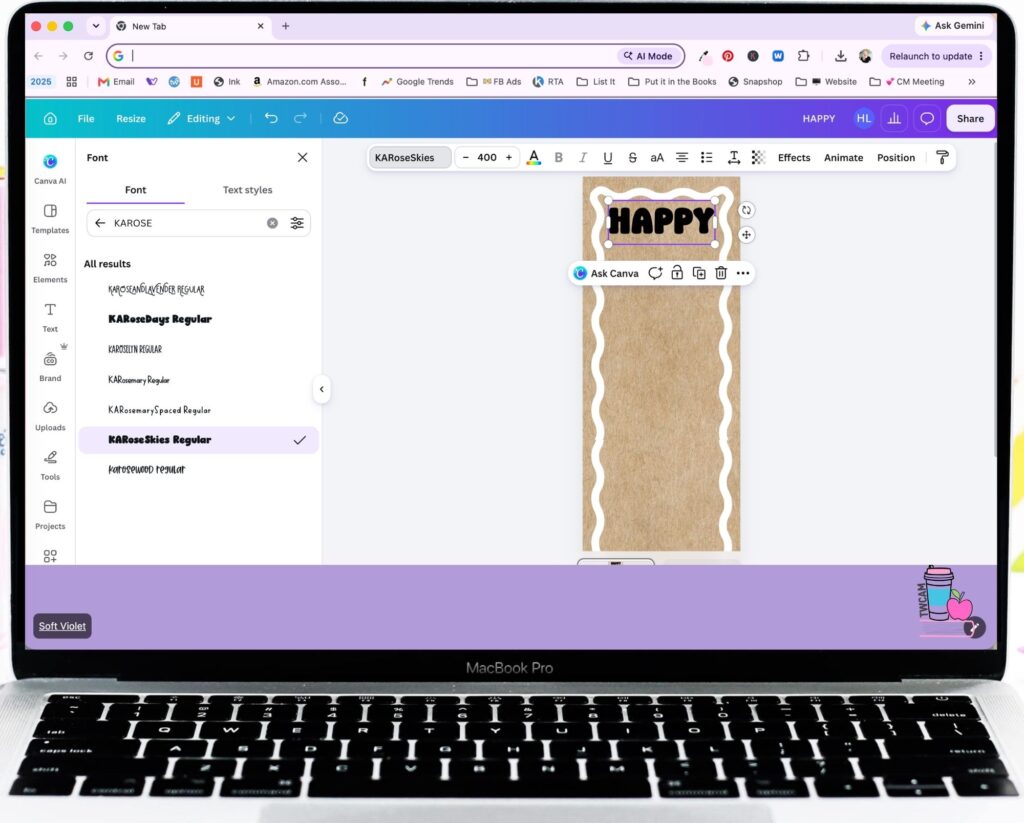
Next, I’m going to copy and paste the word “happy” so that I have two versions.
On the back layer, I’m going to add an effect. We’re going to use an outline and make the outline white.
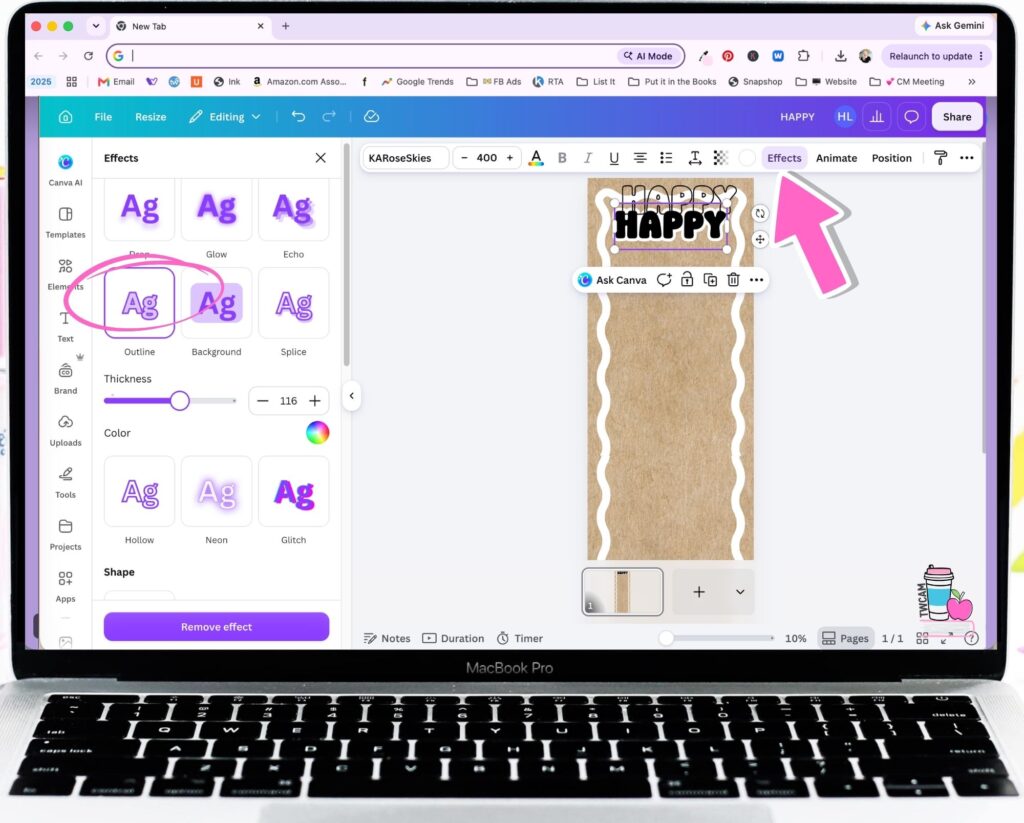
I want the white outline to be pretty thick because I want it to resemble the thickness of the border, but I also don’t want it to touch the border.
We will come back to changing the color of the letters so that they can match our clipart in a later step.
The other layer of the word “happy” is going to be HOLLOW, and it’s going to end up going on top. I like to create it now and just have it hanging out there until I need it.
Next, we’re going to add another text box.
Then type in “first day of” I used KA Big Ideas Regular and made it a little bit smaller than 400 so it would fit.
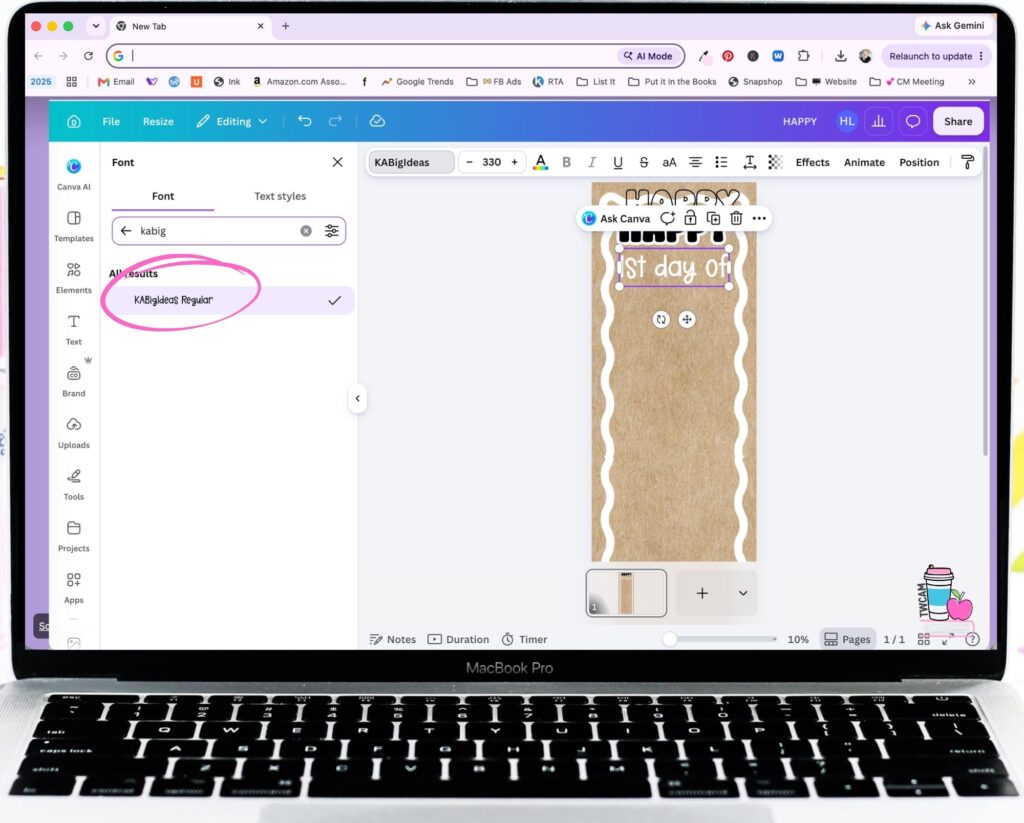
For this part, I didn’t use an outline. I wanted the words to be white because I wanted them to have that painted feel.
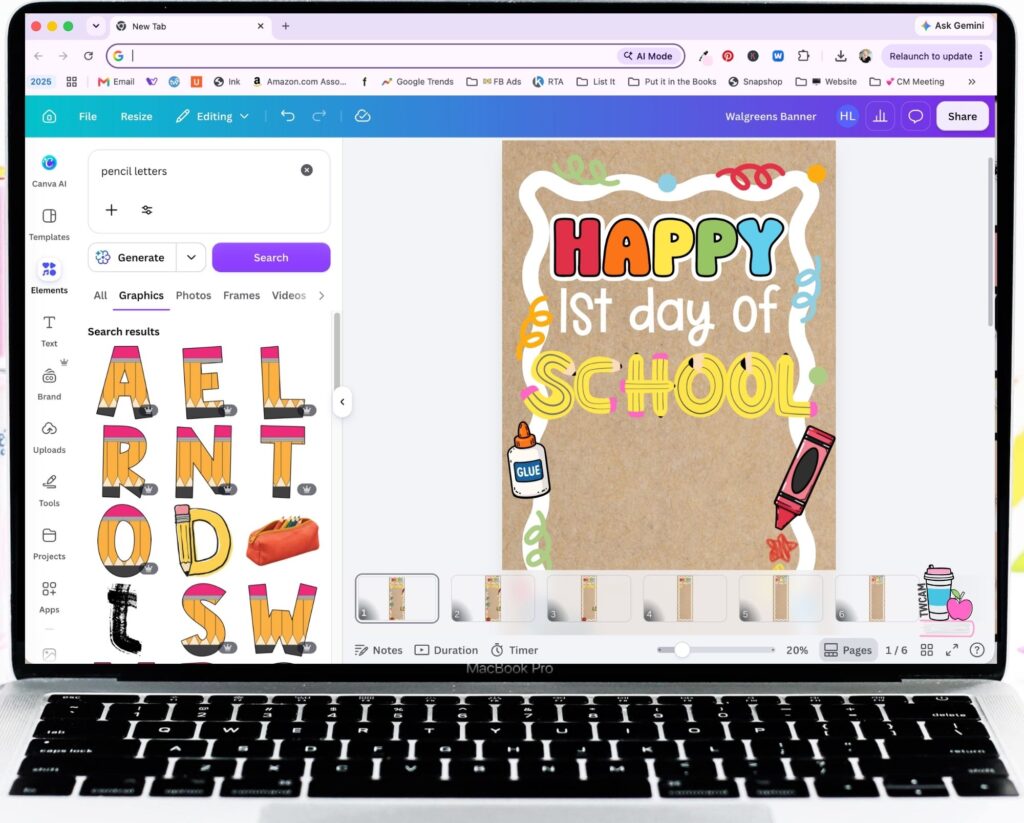
For the word “school,” I used letters that were already available in Canva. You could also keep going with the font you were already using. That’s completely up to you.
To find these letters I typed in “pencil letters”.
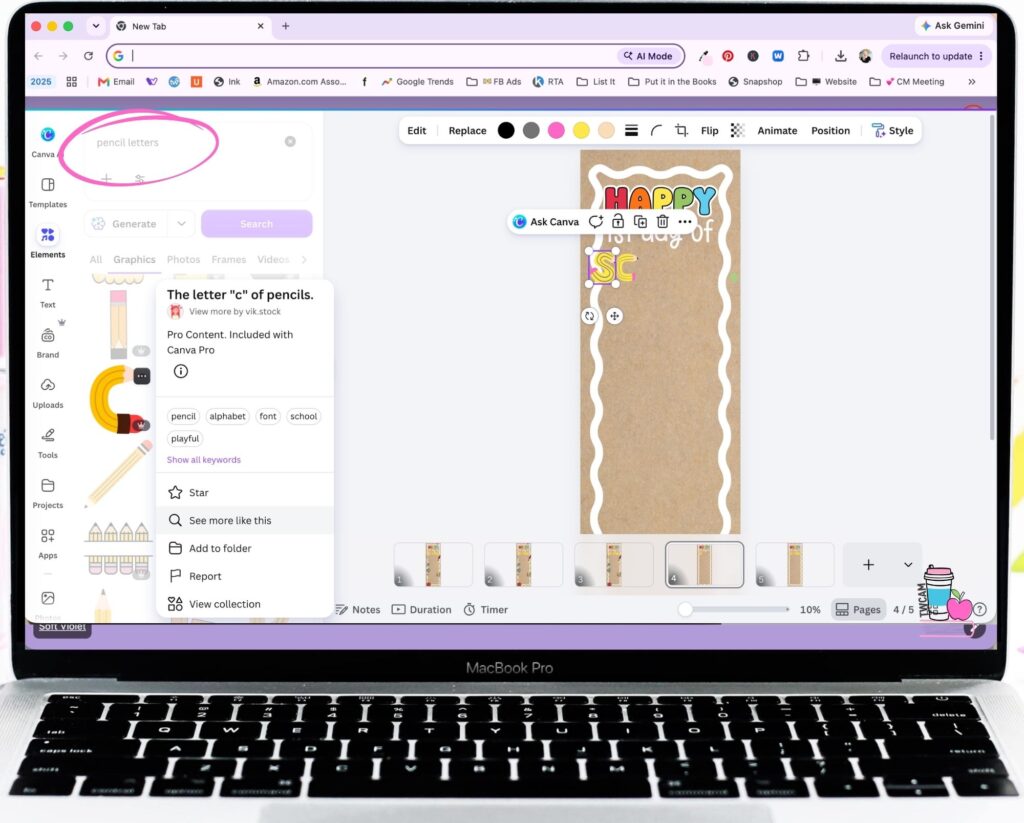
Then I changed the colors. I didn’t want the original colors, so I changed the red to pink and made the yellow a little bit brighter.
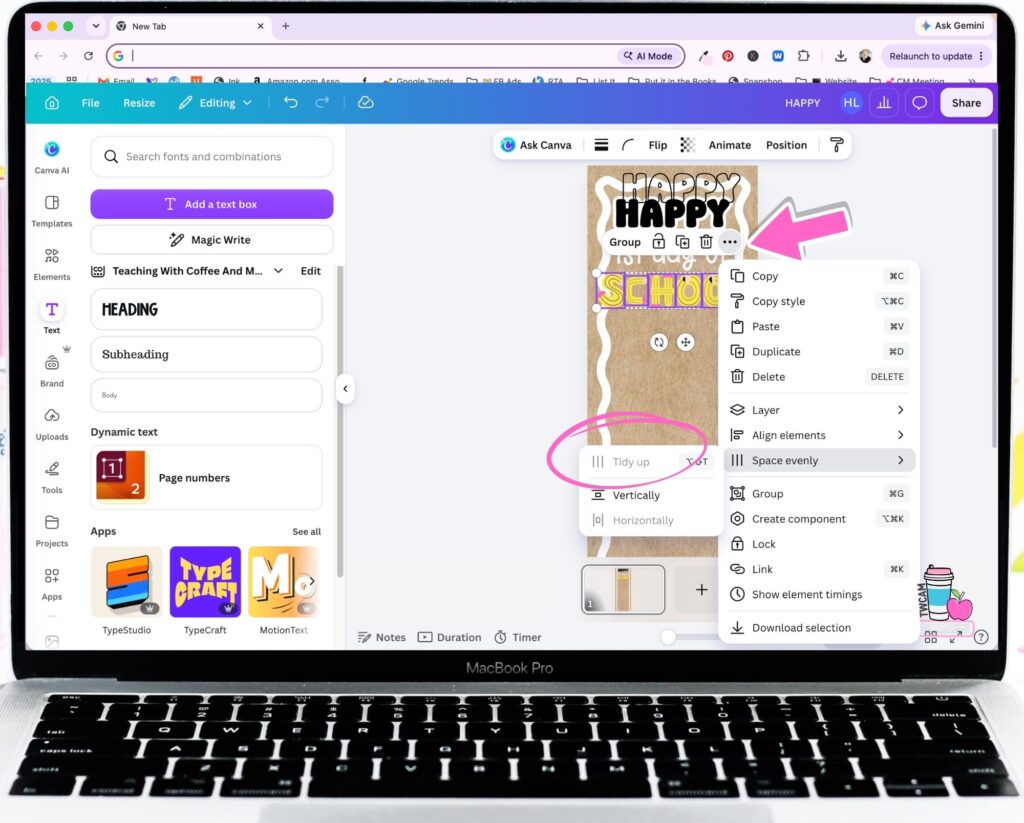
Once all of the letters are in, we can align them to the middle and tidy everything up.
Add Clip Art and Decorative Elements
The next step is deciding what kind of clip art you want to put on your banner.
I used school supplies for mine, but you could easily make this match your classroom theme.
Once you’ve added your clip art, you can also use Canva’s Copy Style feature.
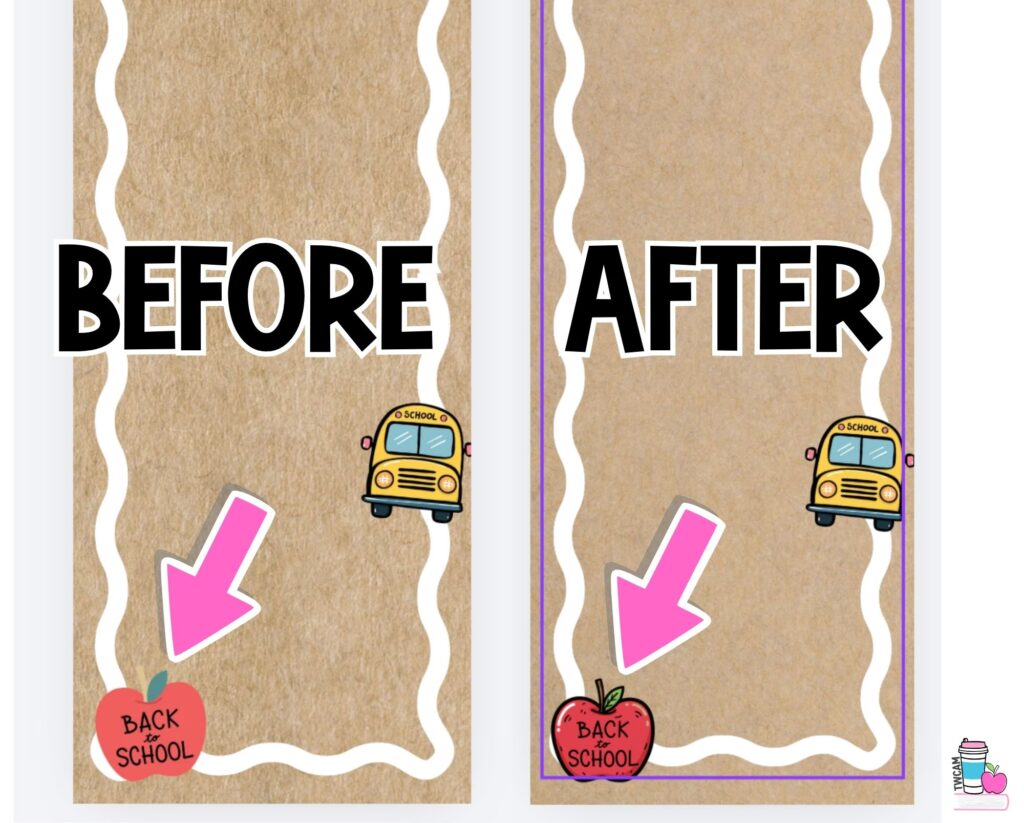
This is one of the things I really like about Canva. I found a bus I liked and a back-to-school apple that I really loved, but they didn’t match. One had a black outline and the other didn’t.
Instead of having to search forever for clip art that matches, you can copy the art/visual style.
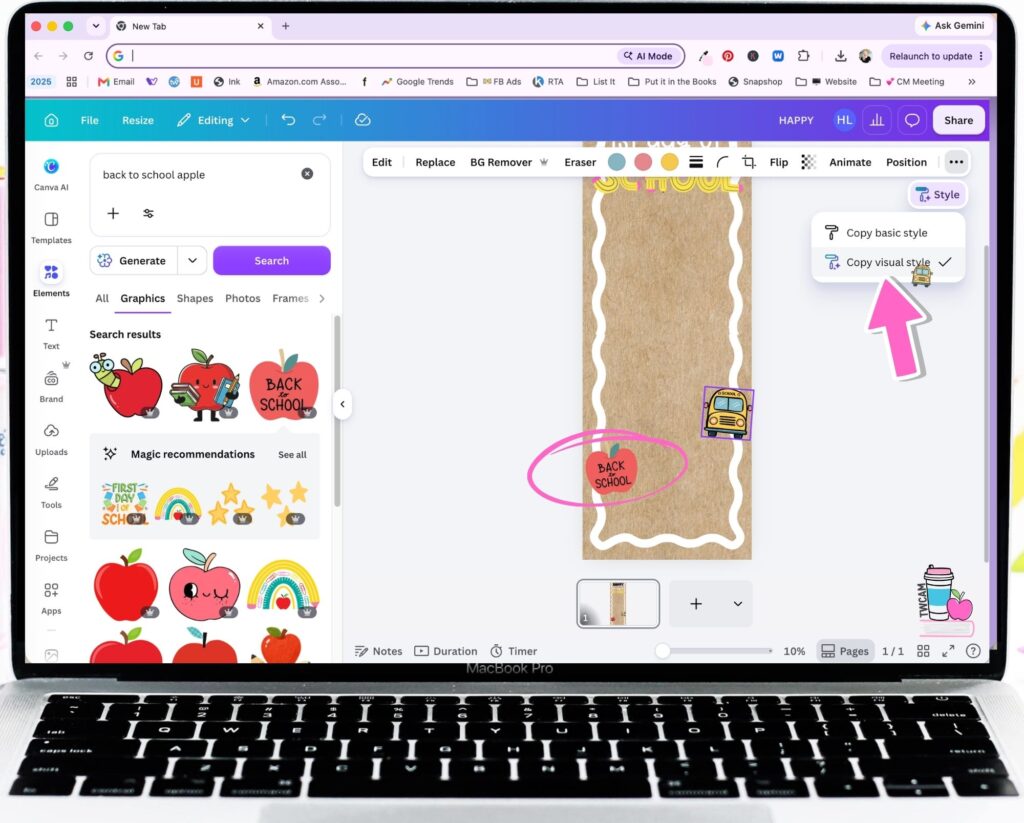
Then Canva gives you the same little black outline and the same style.
You can continue adding whatever clip art, words, or other elements you want on your banner.
Match Your Letter Color to Your Clipart
Once everything is in place, we’re going to finish up the colors and layers.
I like to pull colors directly from my clip art so that everything matches.
Sometimes Canva will pull colors from the image for you, but personally, I like to use the dropper tool.
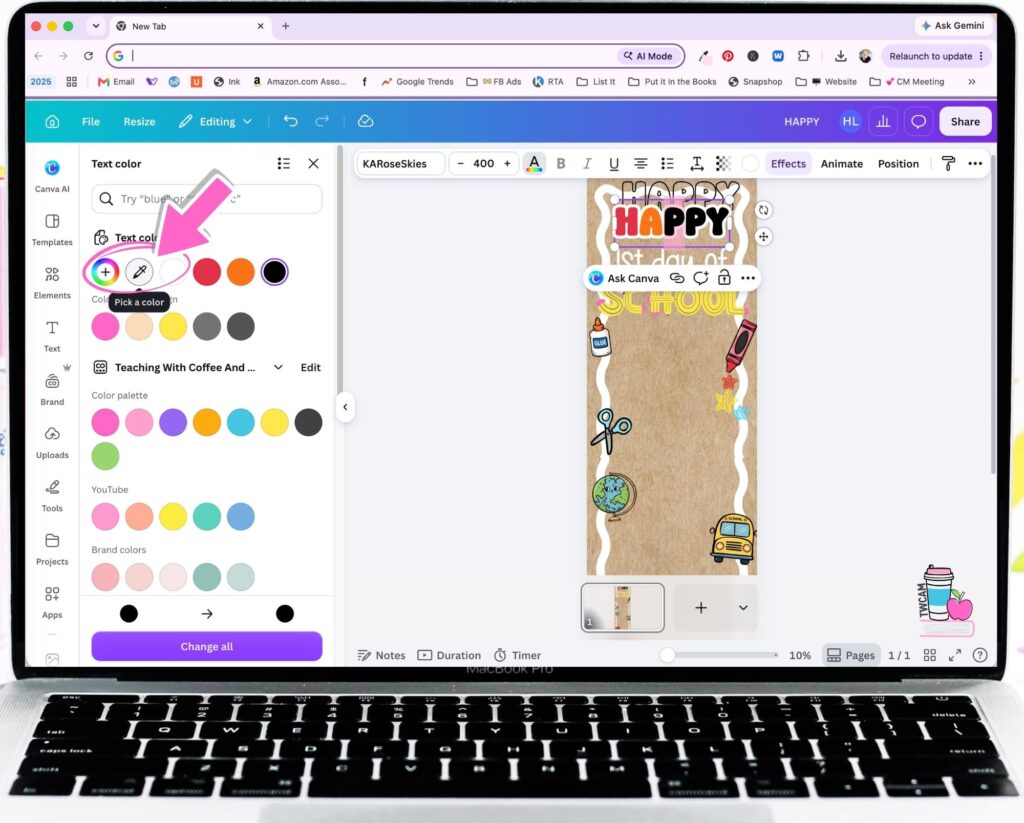
For the outline, I chose a little black outline because I knew my clip art had black outlines, and I wanted everything to tie together.
Remember that hollow word we created earlier?
Now we’re going to layer that on top of the other version of the word.
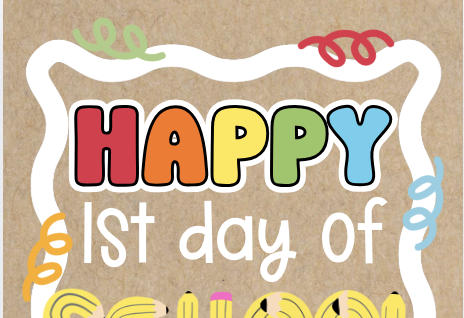
You can also add some little squiggles around the edges. I added these around the border and then changed their colors so they matched my letters.
Then, if you have a couple of spaces that feel like they need something, you can add little circles.
I made mine really small.
And there it is. It’s ready to print.
How to Download Your Banner From Canva
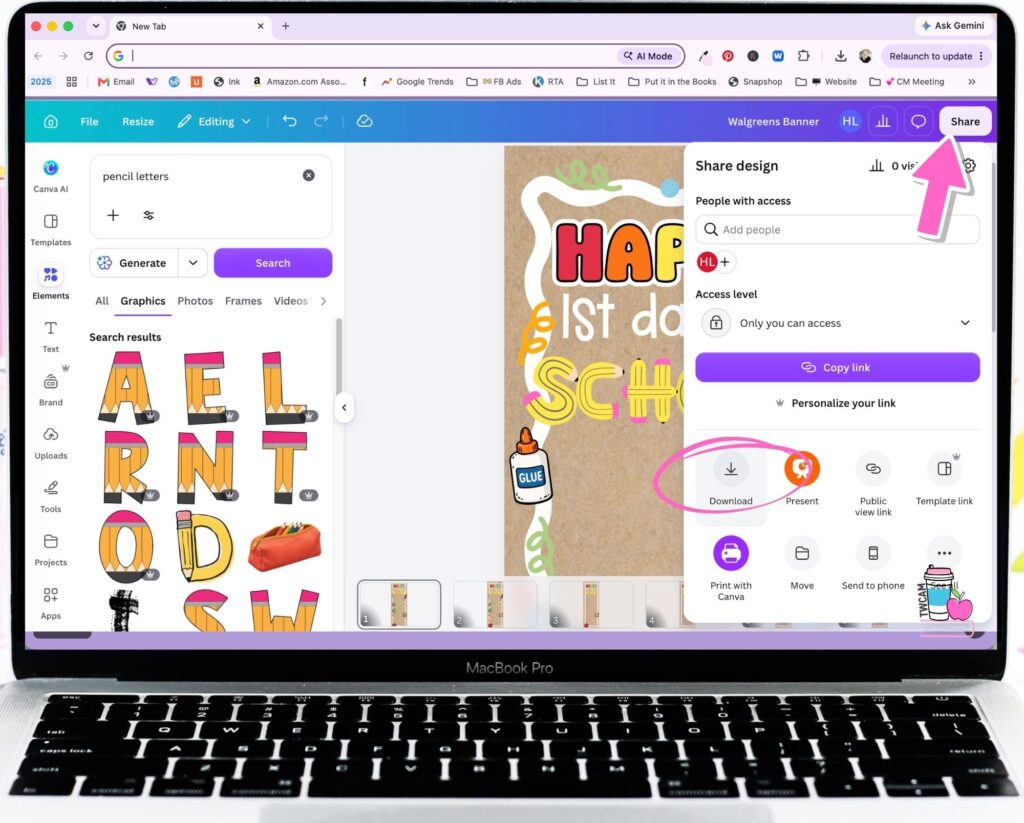
Once you have everything exactly how you want it to look, we’re ready to print your banner from Walgreens, but first we need to download the banner from Canva.
Go to Share and then Download.
I like to keep mine as a PNG.
Choose PNG and Increase the Size
This part is really important.
The size that you export your banner at can determine whether or not it has a low resolution.
We want the resolution to be higher.
You’ll need to export it at at least a 2.5 or higher.
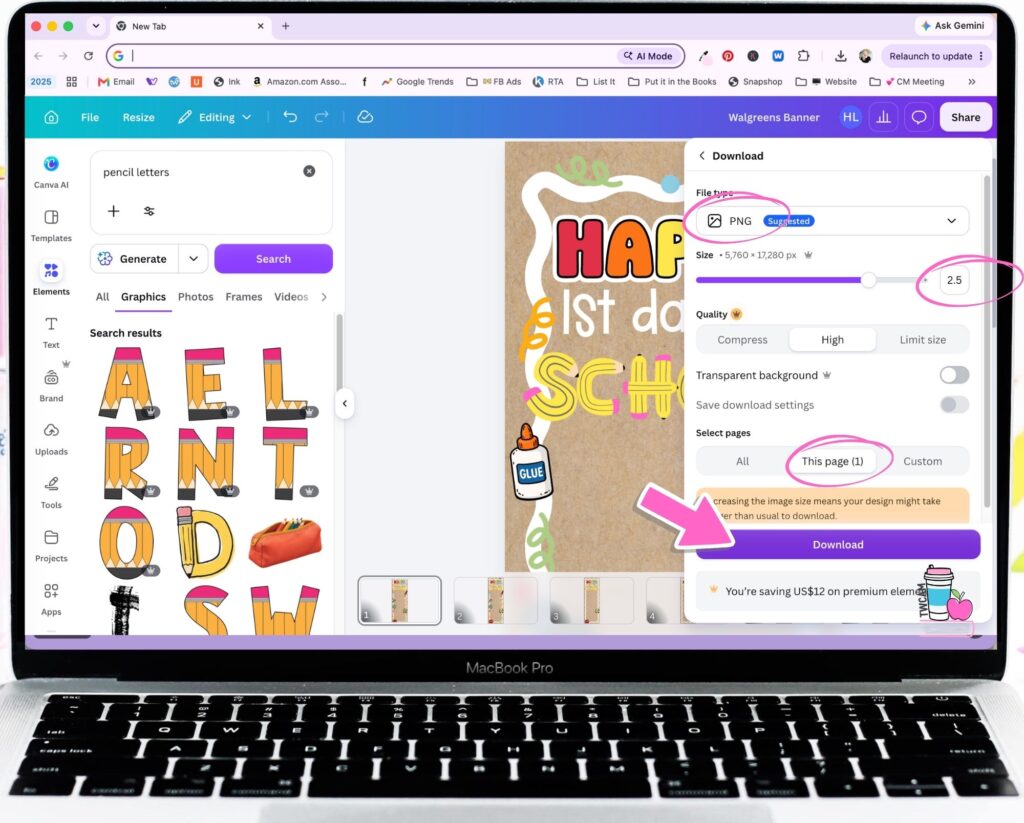
Once you’ve got the correct slide selected, press Download.
Then we’re going to head over to the Walgreens website.
How to Print your Canva Banner at Walgreens
Now it’s time to order your banner! Cue the confetti 🎉- you did it; you designed your own banner for free in Canva.
First, you’re going to go to Photo and then Home because I just find that it’s a little bit easier for me to get where I need to go.
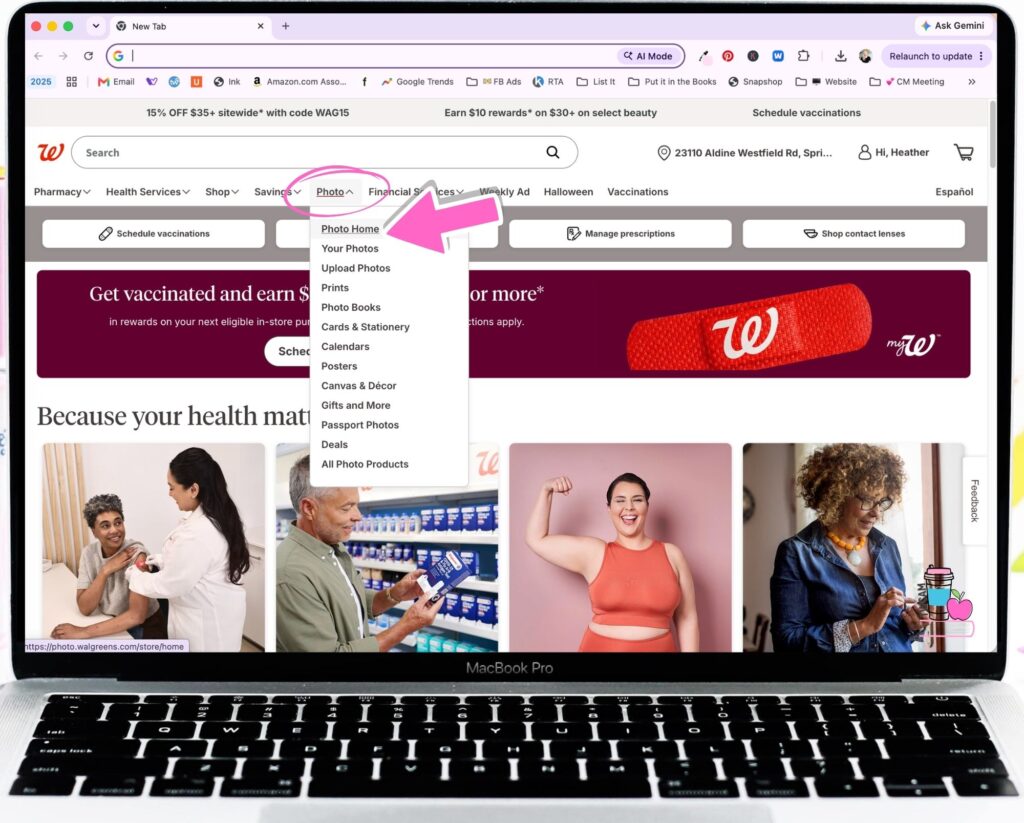
From there, we’re going to go to Posters and then go down to 2 x 6.
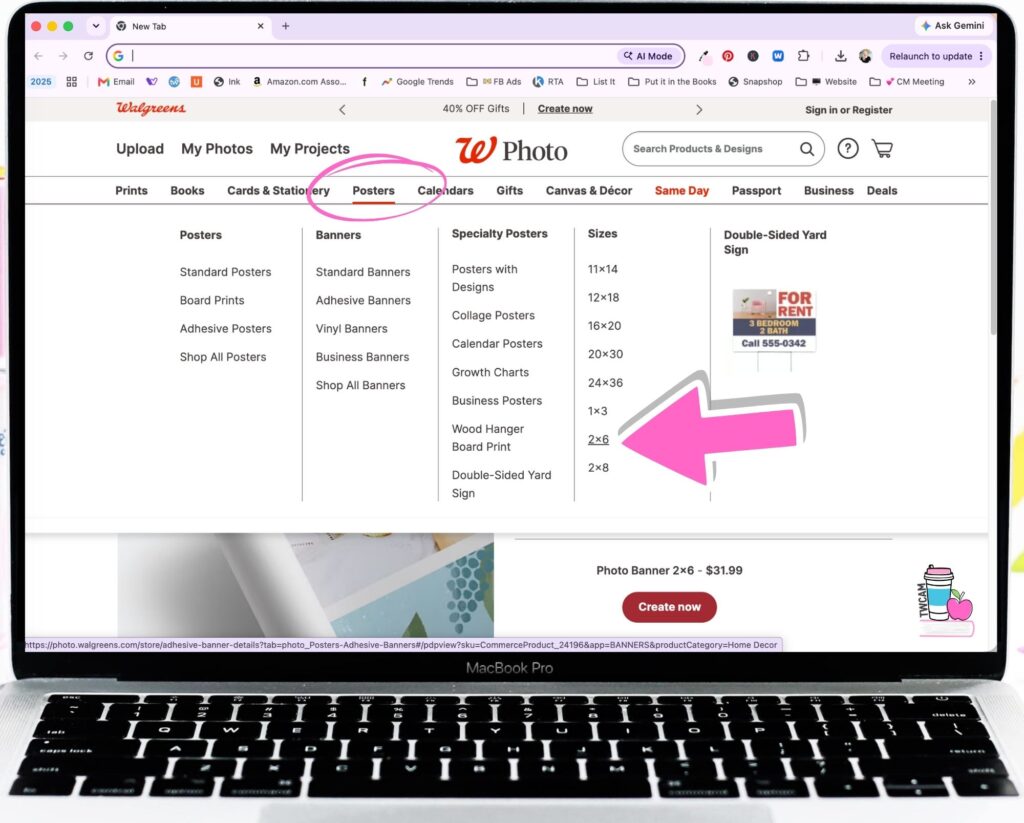
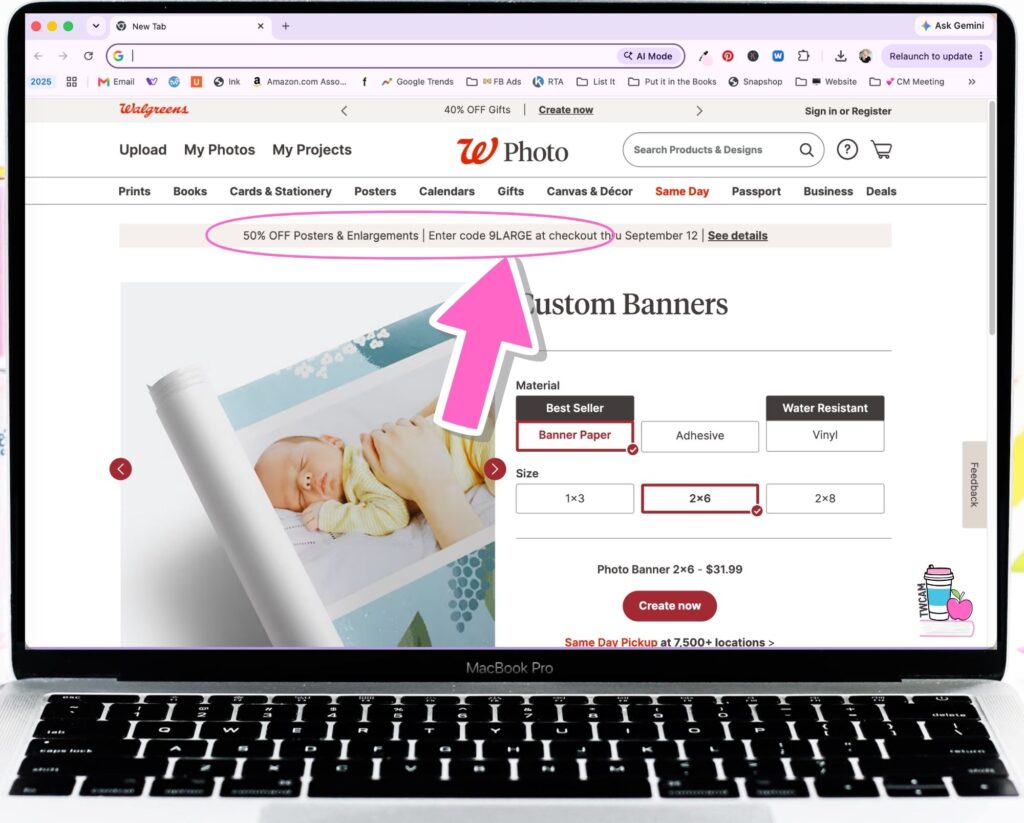
One of the reasons I like going this way is that Walgreens usually has some kind of Walgreens banner deal or coupon code up here.
So, we’re going to grab that code. (FYI The code changes every couple of weeks)
Choose Your Banner Size and Material
Make sure you choose banner paper if you’re looking for the cheaper option.
If you’re wanting to use your banner outside or want something more durable, you could choose vinyl instead.
I have one of the vinyl ones, and it is a really nice, heavy-duty option.
I would also think about how you plan to use your banner. If you’re going to reuse your banner year after year, like a first-day-of-school banner, the vinyl might be a better choice as paper can get easily bent or smushed.
Keep the size at 2 x 6 and then go ahead and choose Create Now.
Upload Your Design
Now we’re going to upload the design we just downloaded from Canva.
Click Upload Photos.
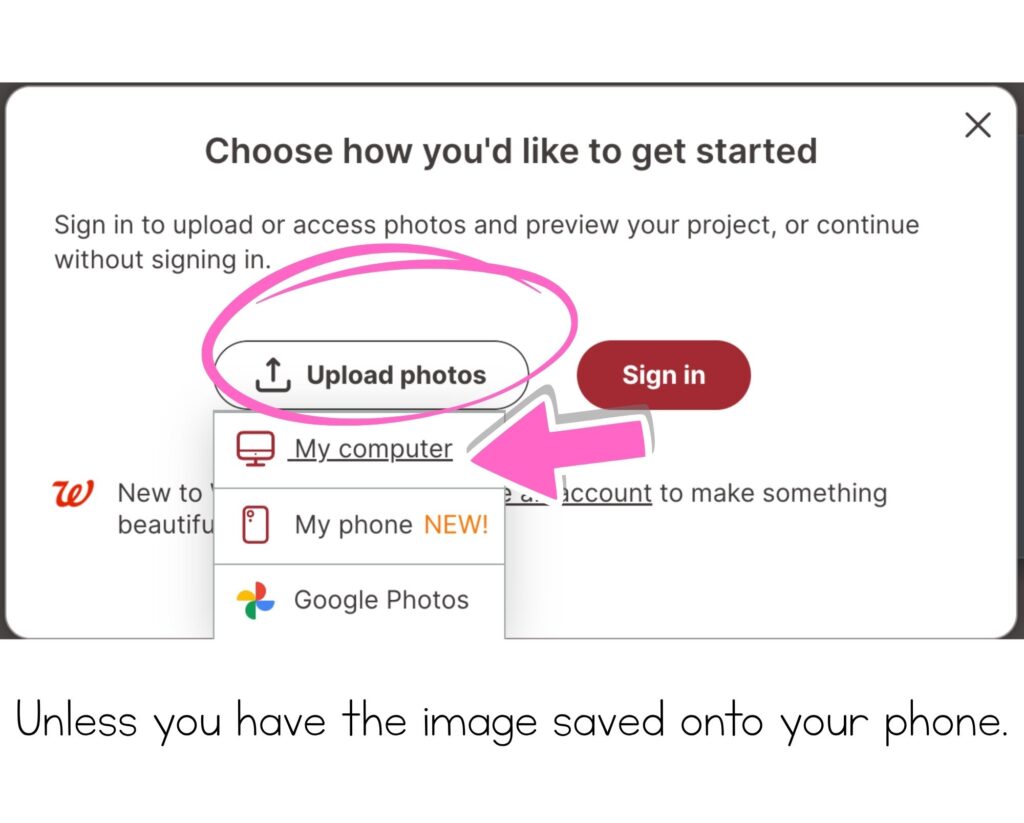
Mine are saved on my computer, so I’ll go wherever I downloaded the file and find the banner.
Select your file and press Open.
It will take a little bit of time to upload.
When it’s finished, your image will pop up. Press the little button that says Done.
From there, make sure you’ve clicked on the image you want to add to your project.
Check the Resolution
If Walgreens says low resolution, you’ll want to go back and check the resolution you exported your image at in Canva.
You DO NOT want it to say low resolution.
If it does, go back to Canva and export your banner at a higher resolution. I usually use 2.5 or higher.
Review and Order
Once you’ve got everything looking right, go to Review Your Order.
Make sure you keep the size at 2 x 6 because that’s what we created.
If you choose 2 x 8 instead, your banner is going to come out wonky and you’ll have to redo it.
Walgreens will show you what the finished banner is going to look like, so take a look at it before you order.
Then proceed to your cart.
Don’t forget to enter the coupon code you grabbed earlier and apply it.
Then you can proceed to checkout.
How Long Does It Take to Make a Walgreens Banner?
From start to finish, it took me a couple of hours.
That includes creating the design and getting everything ready to order.
Want to Save Time?
If you want to save some time, you can find the banner that I made in this tutorial on TPT or Etsy.
You can use it as a starting point or work off of it instead of having to create everything from scratch.
Final Thoughts on The Viral Walgreens Banners
I have to say, I’m loving this Walgreens banner trend.
You get the look of a cute, handmade classroom banner without having to cut out a million letters or pieces and then spend forever trying to get everything lined up.
Once you have your Canva design figured out, ordering it from Walgreens is pretty simple, too. And if you’re willing to spend a little more, the vinyl option gives you a banner that you can reuse year after year.
So if you’ve been wanting to try one of these viral Walgreens banners for your classroom, this is your sign to make one!
How to Print a Banner at Home
If you’d rather save the $15 to $30 that it’s going to cost you to print the banner and you’re thinking you want to print the poster at home, you can do that, too.
You’re going to want to watch my video about how to use Canva to print a poster at home.
All you need is Canva, a pair of scissors, and some glue.
For more classroom DIY tutorials, check out these posts:
Save This DIY Walgreens Banner Using Canva Tutorial for Later
Save this post so you can come back to this Walgreens Banner tutorial whenever you need it! Just pin it to one of your favorite teaching boards on Pinterest. That way, it’s right there when you’re ready to make a banner for your classroom without having to remember all the steps.